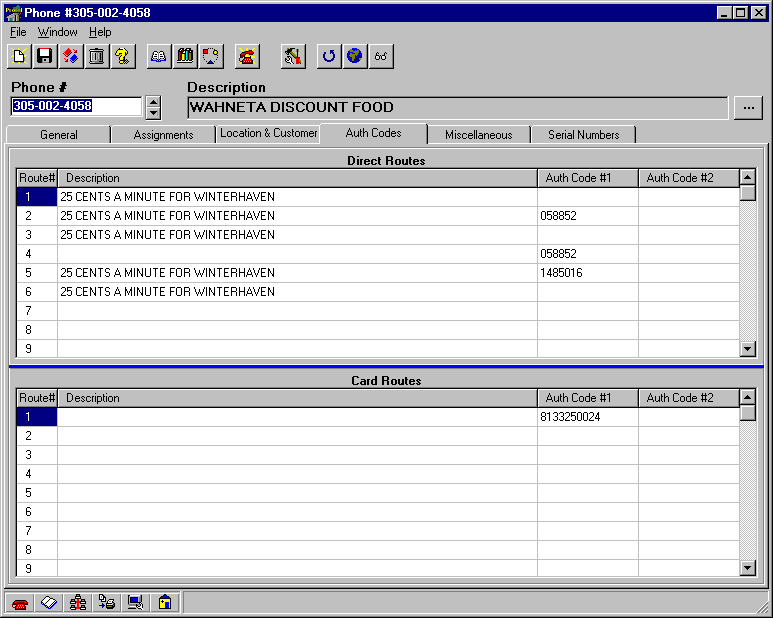
Auth Codes
This tab is where the interexchange carrier (IXC) and the operator service provider (OSP) authorization codes are assigned. These codes are required for a phone to access the IXC/OSP networks, and are part of the string of dialed numbers. The authorization codes are provided by the IXC/OSP carriers. Click on different areas of the picture below for pop-up descriptions; scroll down below the picture for more information.

The Auth Codes tab is located in the
Phone window. To open the Phone window, click on the Phones & Customers button in the Navigator or the Navbar. If the Phone window has not been chosen to open in the Preferences, then either the Quick View window or the Phone List window will appear. In either case, these windows may be used to find the desired phone record. Search records by field in the Quick View window, or search records by Location Name/Description field in the Phone List window. When either method is used, the Phone window will open with the desired phone record displayed.
Panorama has made every type of record accessible by name, for easy identification. For this reason, it is recommended that Auth Codes be entered in
route records, where they can be entered once, named, and referred to by any number of call processing records, and in turn referenced by any number of phones. If the authorization code is entered in the phone recordís Auth Codes tab, the complete number must be re-typed each time it is needed.
When an entry is made in the Auth Code #1 and/or Auth Code #2 field within the Auth Codes tab of the
Phone window, the Route# has to be assigned a route record which has the Use code entered at Site radio button selected or the code entered here will be ignored. To verify that this radio button has been selected:
1. Note the route number and type (Direct or Card) where a code was entered in the phone window.
2. Select the
Assignments tab in the Phone window and right-click on the name of the Call Processing under the word Current. Select edit from the menu that appears. The Call Processing window opens with the proper record active.3. Click the Edit Route Assignments button and note the route record that is assigned to the route that was noted in step 1.
4. Open the Route window and make the record that was noted in step 3 the active record.
5. Verify that the radio button Use code entered at Site is selected in the Authorization Code #1 and/or Authorization Code #2 section of the Route window, as needed.
WARNING: If other phones reference this route record, they will not be able to access the intended carrier unless the authorization code is also entered in the other phones
í records (in the Auth Codes tab of the Phone window). Since this type of change might effect records that you are not aware of, it is recommended that if an authorization code changes for some but not all phones, create a new route record and assign it to the phones that will be effected.